Detesto admitirlo, pero no puedo vivir sin orden....por más que incursione en el mundo del arte y lo “no estructurado”, mi yo ingenieril me supera y TIENE que haber orden. De algún tipo, cualquier orden, pero orden al fin.
I hate to admit this, but I can´t live without order...it doesn't mean anything to put some art and no-structure in my life, my inner engineer it's stronger and there HAS to be some order. Of some sort, any type of order.
¿A qué viene esto? Hace tiempo que venimos charlando con Tom de hacer algún tipo de estantería integrada para ganar espacio en el lavadero. Decidimos armar un conjunto integrado que contuviera la heladera, una alacena con doble puerta (similar a una de una sola puerta que ya tenemos en el lavadero) y en un lateral una estantería vertical.
Movimos un poco las cosas de lugar (pusimos el microondas que estaba sobre la heladera a la mesada del lavadero).
Where am I going with this? We've ben talking about this for a long time with Tom: building some shelving and built in the laundry room to gain more space. We wanted to incoroprate the fridge into this whole thing. Add cabinets (we do have a similar one already) and vertical shelves.
We moved the things a little bit: we placed the microvawe on top of the Corian counter.
Toda esta operación nos llevo unos cuantos días repartidos principalmente en fines de semana.
Pero vamos paso a paso:
Primero dibujamos todas nuestras ideas y divagamos en el mismo lavadero moviendo cosas y viendo qué quedaba mejor dónde.
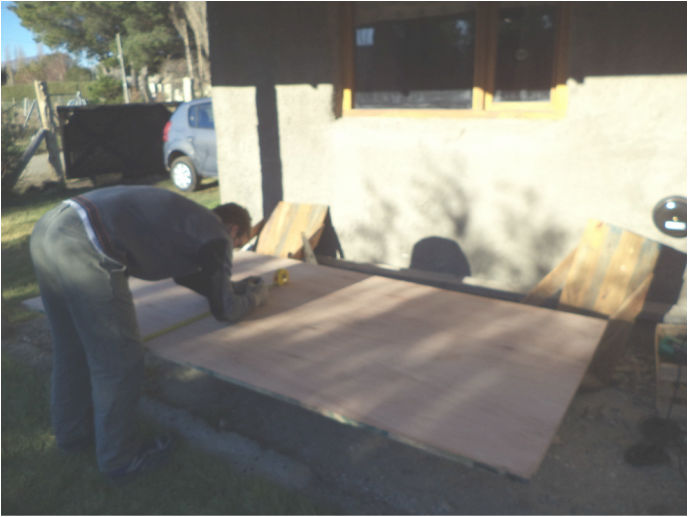
Después de decidirnos por una disposición fuimos a comprar una placa de fenólico y cortamos los pedazos según las medidas.
This whole operation took us a few days but all of them were part of weekends.
But lets go step by step:
First, we draw our ideas and we spent some time moving things in the laundry room to see what suited us best and where should every thing be placed.
After that we decided to go with one disposition, we bought one plate of plywood and we cut it into the pieces we needed.
I hate to admit this, but I can´t live without order...it doesn't mean anything to put some art and no-structure in my life, my inner engineer it's stronger and there HAS to be some order. Of some sort, any type of order.
¿A qué viene esto? Hace tiempo que venimos charlando con Tom de hacer algún tipo de estantería integrada para ganar espacio en el lavadero. Decidimos armar un conjunto integrado que contuviera la heladera, una alacena con doble puerta (similar a una de una sola puerta que ya tenemos en el lavadero) y en un lateral una estantería vertical.
Movimos un poco las cosas de lugar (pusimos el microondas que estaba sobre la heladera a la mesada del lavadero).
Where am I going with this? We've ben talking about this for a long time with Tom: building some shelving and built in the laundry room to gain more space. We wanted to incoroprate the fridge into this whole thing. Add cabinets (we do have a similar one already) and vertical shelves.
We moved the things a little bit: we placed the microvawe on top of the Corian counter.
Toda esta operación nos llevo unos cuantos días repartidos principalmente en fines de semana.
Pero vamos paso a paso:
Primero dibujamos todas nuestras ideas y divagamos en el mismo lavadero moviendo cosas y viendo qué quedaba mejor dónde.
Después de decidirnos por una disposición fuimos a comprar una placa de fenólico y cortamos los pedazos según las medidas.
This whole operation took us a few days but all of them were part of weekends.
But lets go step by step:
First, we draw our ideas and we spent some time moving things in the laundry room to see what suited us best and where should every thing be placed.
After that we decided to go with one disposition, we bought one plate of plywood and we cut it into the pieces we needed.
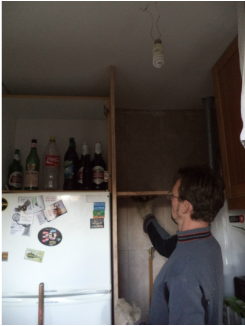
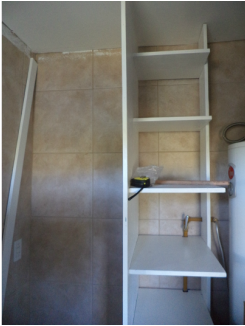
Fuimos armando la estantería, que era la parte más crítica mientras cortábamos.
(Nota: nuestra hermosa casita tiene un pequeño defecto: muchas de las paredes están fuera de escuadra, lo que hace sumamente importante montar los elementos que van empotrados y hacer cada pedazo a medida, antes de darle el look final).
We started to build the shelves, before painting the plywood, just to see if our idea was going to work.
(Side note: our house has a little problem: many of the walls are not well leveled, which makes it crucial in some cases to build the whole thing first to see if any dimensions have to be modified. Every piece has to be cut to fit its final position.)
| 
|
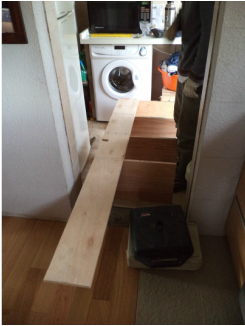
Desarmamos todo y devolvimos todo lo que habíamos movido a su lugar.
Ahora quedaba la gran tarea de lijar todas las placas y pintarlas (le di 3 manos de pintura blanca látex satinada). Debo decir que la calidad del fenólico que compramos daba mucho que desear y si hubiéramos elegido alguna otra placa que asegurara una superficie más lisa quizás hubiera quedado más “perfecto”, pero el costo juega un importante papel. Decidimos que la perfección en el lavadero no era lo más importante, asi que nos decidimos por la placa más barata. De todas maneras la terminación después de pintarla fue muy buena!
We dismanteled the shelving and put everything back to its original place.
The next step was to sand all the boaards and paint them (I put 3 coats of white paint) I have to say that I am not happy with the quality of the plywood and if we would've bought another type of wooden board with a more even surface, we could've had a more “perfect” look, but cost plays a mayor role in these decisions. We decided that “perfect” was not necessary in the laundry room, so we went ahead with plywood. In the end, we were very happy with the result after painting the boards.
El último paso fue volver a mover todos los muebles y trastos y armar todo el conjunto.
The last step was to move all the furniture and things we had stored and build it.
| 
|
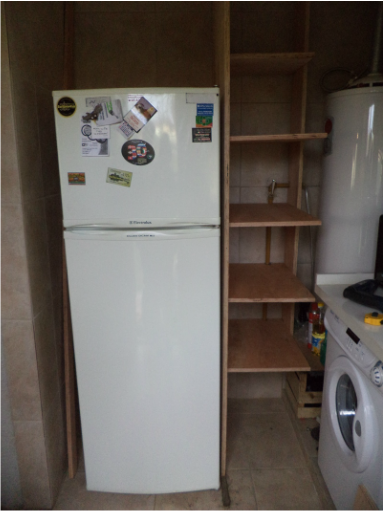
Estamos super contentos con el producto final, estamos totalmente felices de poder sacar las mil y una cosas que teníamos apiladas o en caja, pero de todas maneras este proyecto sigue en proceso.
We are amazed with the final product and we are happy to be able to have place to store everything we had piled in that room. Anyway, we still have a lot of work in there.
We are amazed with the final product and we are happy to be able to have place to store everything we had piled in that room. Anyway, we still have a lot of work in there.

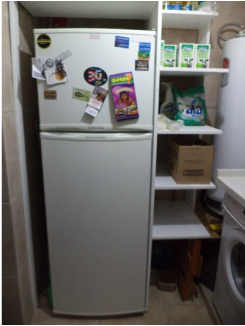
ANTES / BEFORE | 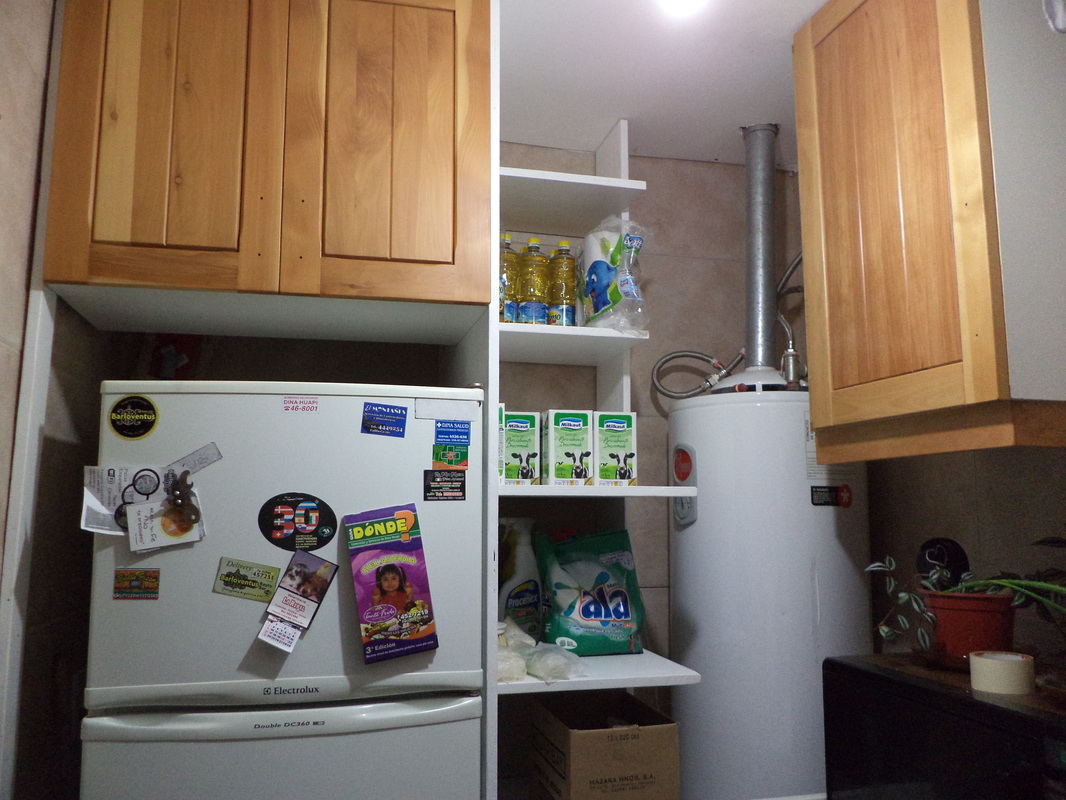
DESPUÉS / AFTER |
Pasos a seguir:
-Elegir alguna tela (gama de los turquesas?) y hacer una cortina para tapar debajo de la mesada
-Posiblemente hacer un estante debajo de la mesada
-Determinar qué hacer en el hueco que quedó entre la heladera y la alacena. Opciones: tapa de madera (blanca o de algún color), cortina, estantes arriba y abajo.....sugerencias?
-Poner también una cortina para tapar el escobero (entre heladera y pared)? Alguna otra opción?
-Moldura/tira de madera en el techo: ojo con la apertura de la puerta de la alacena.
-Luz
To-do list:
-Choose a nice fabric (maybe some type of turquoise?) and sew curtains below the counter.
-Possibly build a shelf below the counter.
-Think possible solutions for the space between the fridge and the cabinet. Options: wood board (white or some other color), curtain, shelves...other suggestions?
-Add curtain to hide the brooms and similar between the fridge and the wall. Any other idea for this place?
-Moulding on the roof limit: we have to be careful to be able to open the the cabinet door.
-Lighting
Bussi!


 RSS Feed